Table of Contents
Everything in blade making is a trade-off. So if you want the feel of a 1-ply blade, you have to give up the durability of a multi-ply blade. It means that if you smack your 1-ply against the table edge, it will probably crack along the entire length of the face, as opposed to a multi-ply that would sustain a smashed and or chipped area. The good news is the 1-py is easier to repair than the multi-ply. I will describe how further down the page.

Blade Care
- Do not leave any 1-ply blade outside or exposed to direct sunlight or exposed to moisture or temperature extremes.
- To provide some protection against edge dings and breakage get some clear 2-part epoxy and carefully apply it around the blade edge.
- Don’t throw or drop the blade as it will probably split in half rather than get dinged-up like a multi-ply blade.
- Although American Hinoki blades are shipped lightly sealed, remove rubber slowly and carefully the first time. Seal blade more if required. It is essential if you use water-based glue as wood does not like water, especially one ply.
- Do NOT use a water-based sealant to seal blades. Wood does not like water.
Blade Repairs
WARNING: Make sure you get an old blade or piece of wood and go through all repair steps in a dry run before actually doing it on your blade. It applies to repair cracked blades or fixing dings.
Dings - If your blade gets a ding on edge, cover the ding with a small wet piece of a paper towel. Using a clothes iron set on medium-high, or better yet a soldering iron, gently press down on the damp paper towel to apply steam to the ding.
It will raise the grain hopefully enough to remove the ding. It is best to practice this technique on a scrap piece of wood before trying it on your blade.
Face Dings - Face dings are a bit different since the face is usually sealed. Because of this you must use a tiny diameter pin or object to pierce the polyurethane seal so that the steam can reach the wood. After you do this, follow the same procedure for edge dings.
WARNING: Repairing a face ding will usually not result in a nice invisible repair. You will need to sand and reseal, and the repair will be visible.
Breakage - If you break a 1-ply it will probably break cleanly along a grain line. To repair this get some yellow wood glue and apply a thin, even coat to both pieces at the break then join the pieces together.
Now somehow clamp the two pieces together (get a 6” min-width clamp from HW store) and wipe up excess glue with a damp cloth or paper towel, then let dry overnight. The difficult part is clamping the two pieces together (don’t clamp real hard or clamp will crush edges of blade). The blade will be stronger after the repair than before.
Make certain you do a practice run first using no glue, making sure everything will work.
How to Repair Cracking Racket Handle
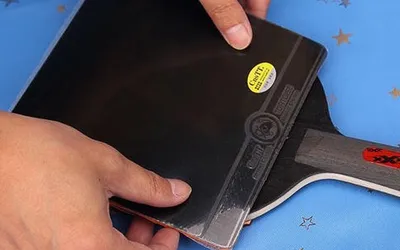
The standard table tennis blade will have the front and back surface. The big head has a width of 2.6mm, and the small head is having a width of 2.2cm. The handle for the penhold blade is having the length of 8cm while the shakehand blade has a length of 10cm.
The table tennis handle is generally hollow in the inner part to reduce vibration and weight. For penhold blade, the hollow part is stretch to the length of 4cm and the width of 1.5cm. While for the shakehand blade, the handle is hollowed out for the length of 6cm and the width of 1.5cm.
After cutting off the hollowed part, the blade and the handle bonded with high-grade white latex will become very little.
Before repairing, you need first to remove the handle. Hold the blade with the left hand to hold it in a stand-up position. Get a utility knife with your right hand, squeeze the utility knife to the handle with the combination pieces of the blade and handles. It is the area that having a width of 2.2cm.
Repeat squeezes the layer of the handle with the utility knife. Because the white latex is “layered”, as long as the strength is mastered, the utility knife will cut the white latex “layer” without damaging the blade and the handle.
Identify the cracked area, drop a little of fast-dry glue into the hollow inner surface, then pinch with your fingers. The handle will get dry quickly and become very sticky.
After that, glue back the handle to the blade with white latex.
If there are burrs, sand with fine sandpaper.
Most of professional table tennis factories are repairing cracked table tennis blades in this way. I have used this method to improve the number of cracking blades for the players as well.
These videos are quite helpful in showing you how to repair a broken blade.
Related post:
Related post:

Warren Davies
Editorial Team
Hi, I’m Warren Davies, a table tennis addict who loves sharing tips, reviews, and everything you need to level up your game. I’ve spent years playing, testing gear, and geeking out over the sport, and I’m here to make things simple and fun for players of all levels. When I’m not writing, you’ll probably find me perfecting my forehand or trying out the latest paddle.